Monday 20 December 2010

The Good Old days

After a visit to the National Motor Museum in Beaulieu, I had this shot of a garage setting inside the museum. It was OK as a straight record shot, but did not convey the olde worlde feeling that I was wanting.

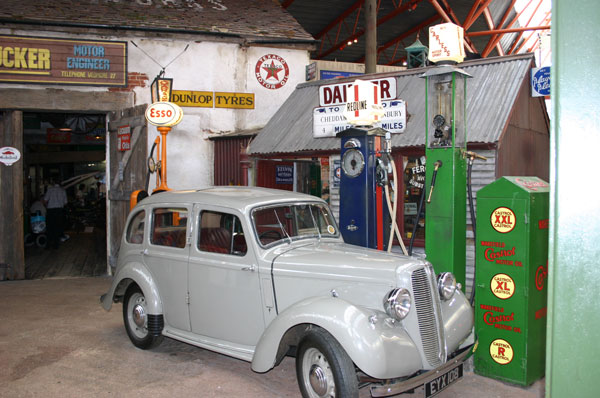
What I did was to start by altering the levels so that I got more contrast in the shiny metal of the car itself. next I painted a mask over the shape of the car. This allowed me to work on the rest of the image besides the car. I reduced the saturation to play down the bright colours. The whole scene seemed to me to have a more "colourless" atmosphere which I was trying to recreate in the image. The large green metal pillar in the foreground was not in keeping with the image so I cropped that out.

All that was left to do then was to put the image in a contrasting frame that made all of these changes stand out even more.


I think this sort of effect works well with most content that has an old feel, though some may suit a sepia toned effect rather than pure monochrome.

Peter Leech

Friday 3 December 2010

Before and After Section

This section was suggested by Chemival from Sunderland. When submitting an image to the site he sent the original as well as the final processed print. This led to the idea of having a section where readers could submit images that they have processed to enhance the original image, but with a few words to show how they achieved it for the rest of us to try.

_____________________________________________________________________________

The image is from a single RAW file shot through a window (ISO 100 fll, 1/250. A RAW image is one where the camera image contains all of the digital data that can still be changed before it saves it as a format such as a JPEG. If you do not have a camera that can save in RAW format then just take three different images at different exposures ( a tripod is preferable for this as the images need to be otherwise identical). With my RAW file I created 3 jpegs using Lightroom 3.2 at 0,+1.5,-1.5 exposures. 

Next I used Photomatix 3.2 to generate the near final result. This programme is used for merging the three different exposures of the same shot. It does it in such a way that it keeps the darkest bits of the darker exposure and the lighter bits of the lighter exposure. When they are merged you get the full range of colours. That is why this process is called HDR - High Dynamic Range. To see more about HDR see the workshop on Searching 4 Inspiration. 

Finally I used Photoshop CS5 RAW editor to finish off (mainly colour and contrast enhancements). That’s basically it. 

What I feel is interesting is that the sky isn’t a classic sunset/rise picture – no wonderful pinks and purples etc. But the HDR processing really brings out so much extra tonal detail it’s astonishing. Here is the final image with so much more detail and colour than the rather dull original.

Chemival